Open tournaments.iq.fishing in any browser. Sign in with your IQ.Fishing account email and password — the same credentials you use in the mobile app.
After signing in you land on the Dashboard, which lists all tournaments you have created.
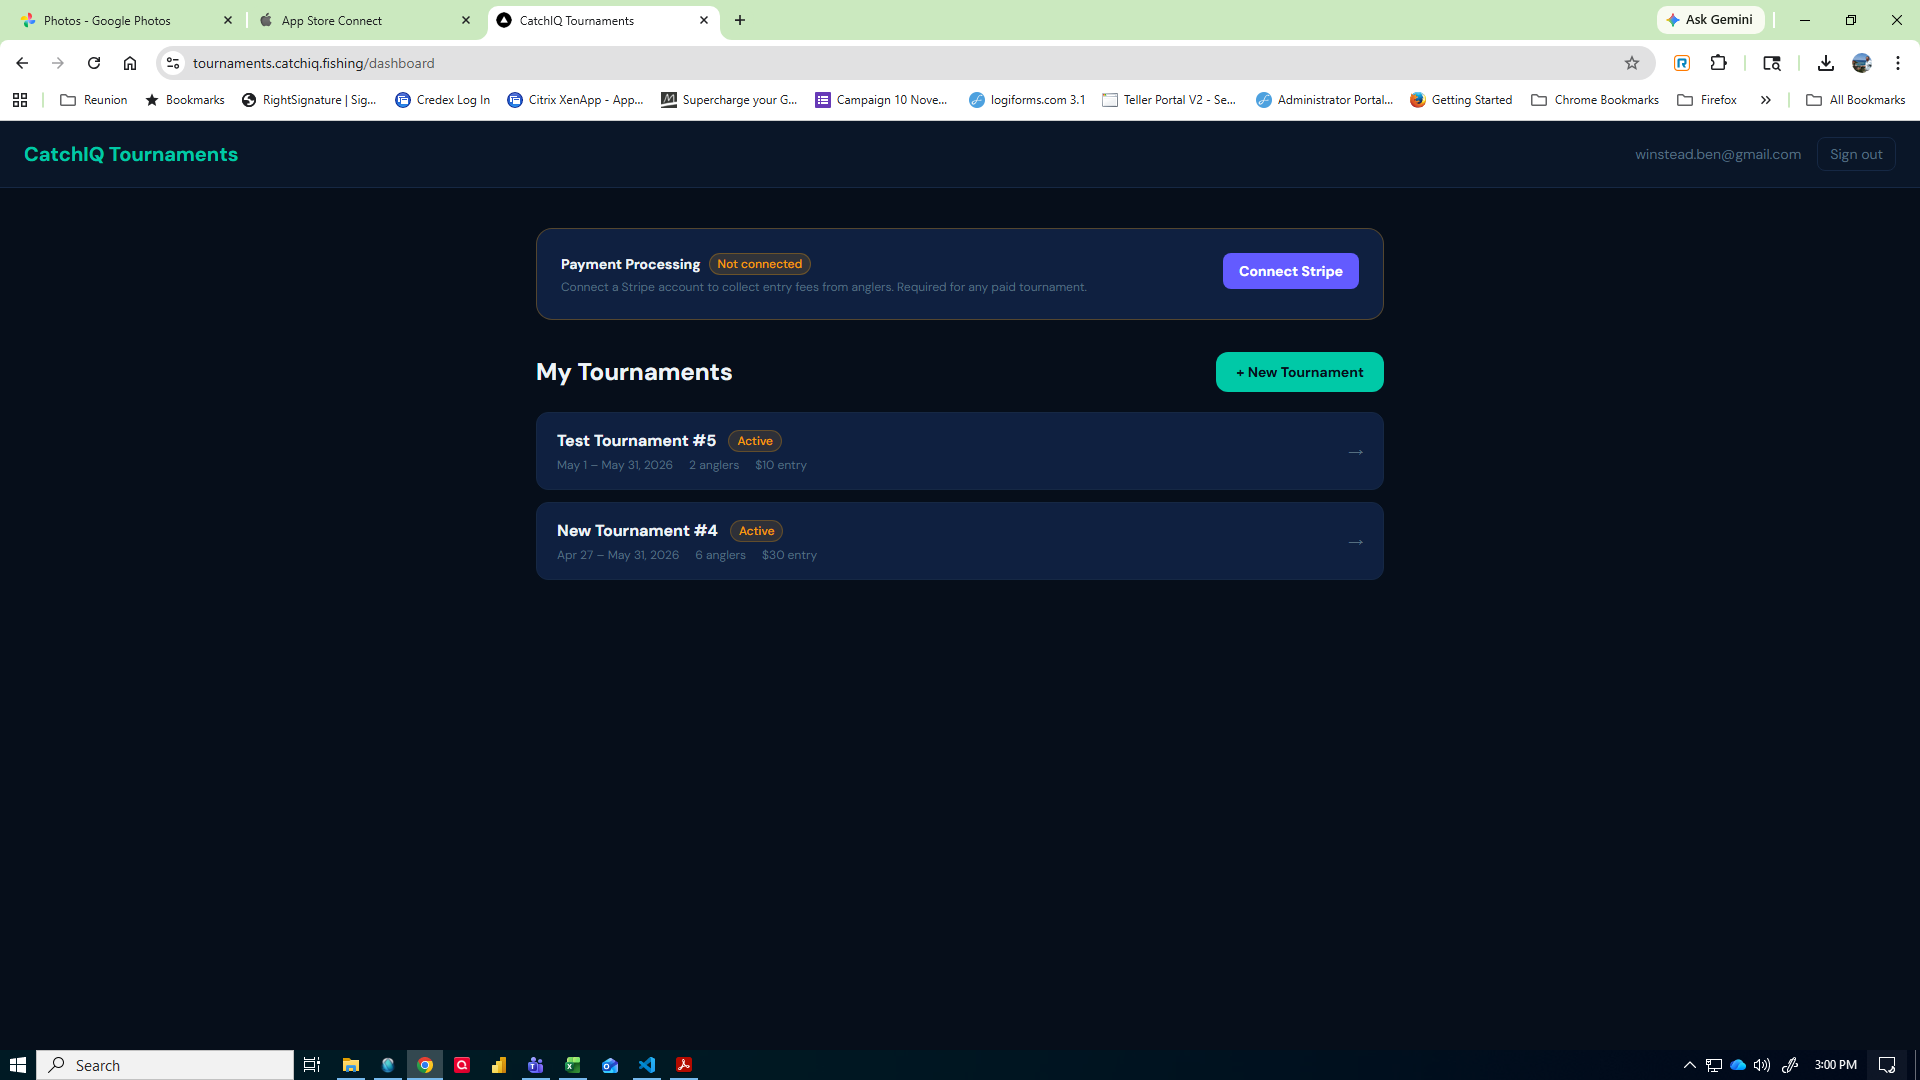
From the Dashboard, click + New Tournament. Fill in the setup form:
- Name & Location — tournament title and optional water body name
- Dates — start and end date/time, and optionally a daily fishing window (e.g. 6 AM – 8 PM)
- Target Species — optional; shown to anglers on the registration page
- Verification Mode — Virtual (photo only), Weigh-in, or Hybrid
- Scoring Method — Largest single fish, Total length, Total weight, or Most catches
- Team Size — set to 1 for individual; 2 or more enables team mode (requires a paid entry fee)
- Entry Fee — leave at $0 for a free tournament; enter a dollar amount to require payment
- Max Anglers — optional cap; registration closes automatically when reached
Click Create. The tournament starts in Draft status — nothing is visible to anglers yet.
Every tournament moves through five statuses. Use the button in the top-right corner of the tournament page to advance — or use ↩ Back to… to revert if needed.
- Draft — visible only to you. The registration link is inactive.
- Registration Open — the registration link goes live. Anglers can sign up and pay.
- Active — tournament is underway. Anglers can log tournament catches in the IQ.Fishing app.
- Scoring — fishing is over. Catches are locked; you review and approve submissions.
- Completed — final standings are set. Scoreboard remains visible.
Click Edit on any tournament that is not yet Completed or Cancelled. You can change the name, dates, location, species, scoring method, entry fee, and other settings.
Changes take effect immediately. If you change the entry fee after anglers have already registered, existing paid entries are not affected — only new registrations use the updated fee.
A tournament can only be permanently deleted while it is in Draft status. Once registration opens, delete is disabled to protect existing registrations.
To remove a live tournament, advance it to Completed or contact support.
Once you advance to Registration Open, a registration link appears at the top of the tournament page. Click Copy and share it with your anglers via text, email, or social media.
The link opens the public registration page where anglers enter their details and pay the entry fee if applicable. Anyone with the link can register — no IQ.Fishing account required to sign up.
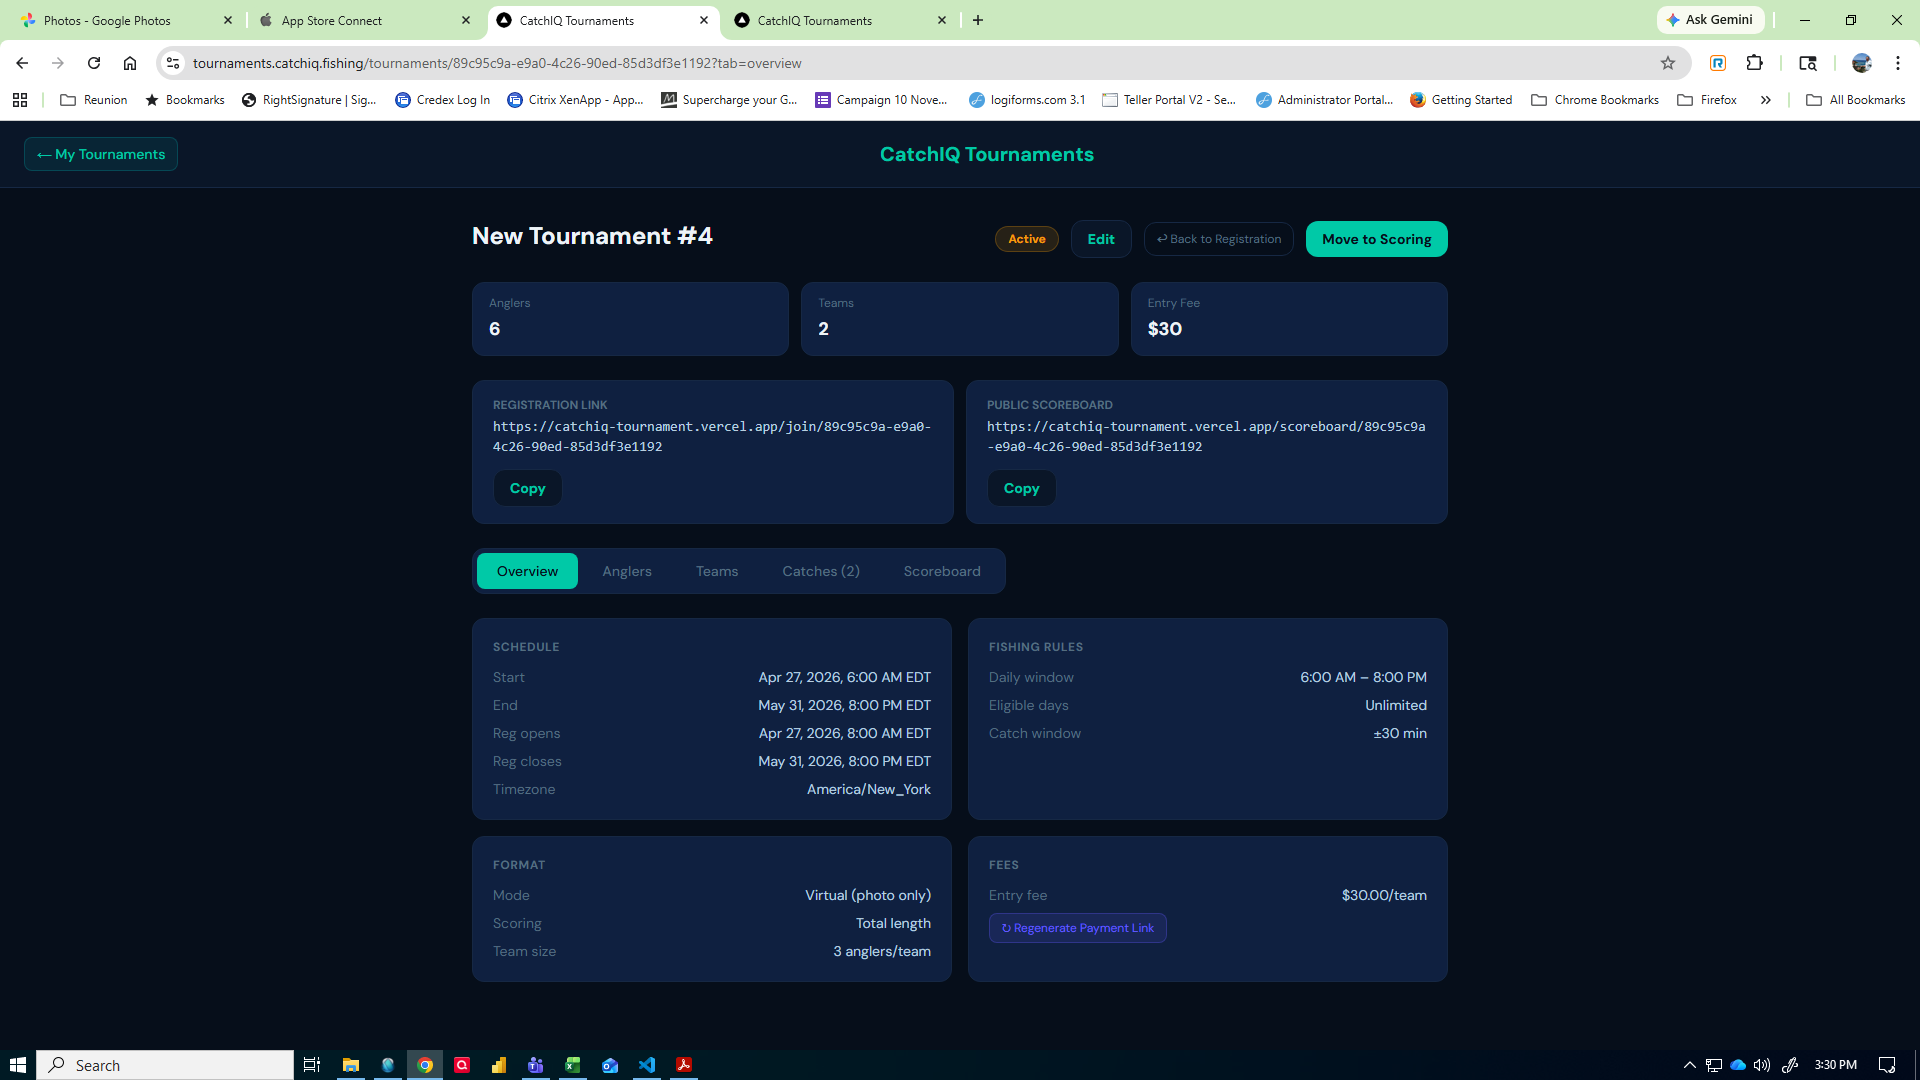
Open the Anglers tab. Use the Add Angler form at the top to add someone directly — useful for walk-up registrations or when managing a pre-set roster.
- Enter the angler's full name (required)
- Enter their email address (optional — if provided, a join code is emailed automatically)
- For team tournaments, select which team to assign them to
- Click Add & Send Invite
Anglers added without an email will appear on the roster but won't receive an email — you'll need to share their join code manually.
The Anglers tab shows a table of everyone on the roster with their name, email, team (if applicable), and status.
Status indicators:
- Registered (green) — angler has paid or been confirmed; their join code is active
- Invited (amber) — added to the roster but has not yet linked the code in the IQ.Fishing app
To remove an angler, click Remove on their row. This also voids their join code. Payments are not automatically refunded — handle refunds through your Stripe Dashboard.
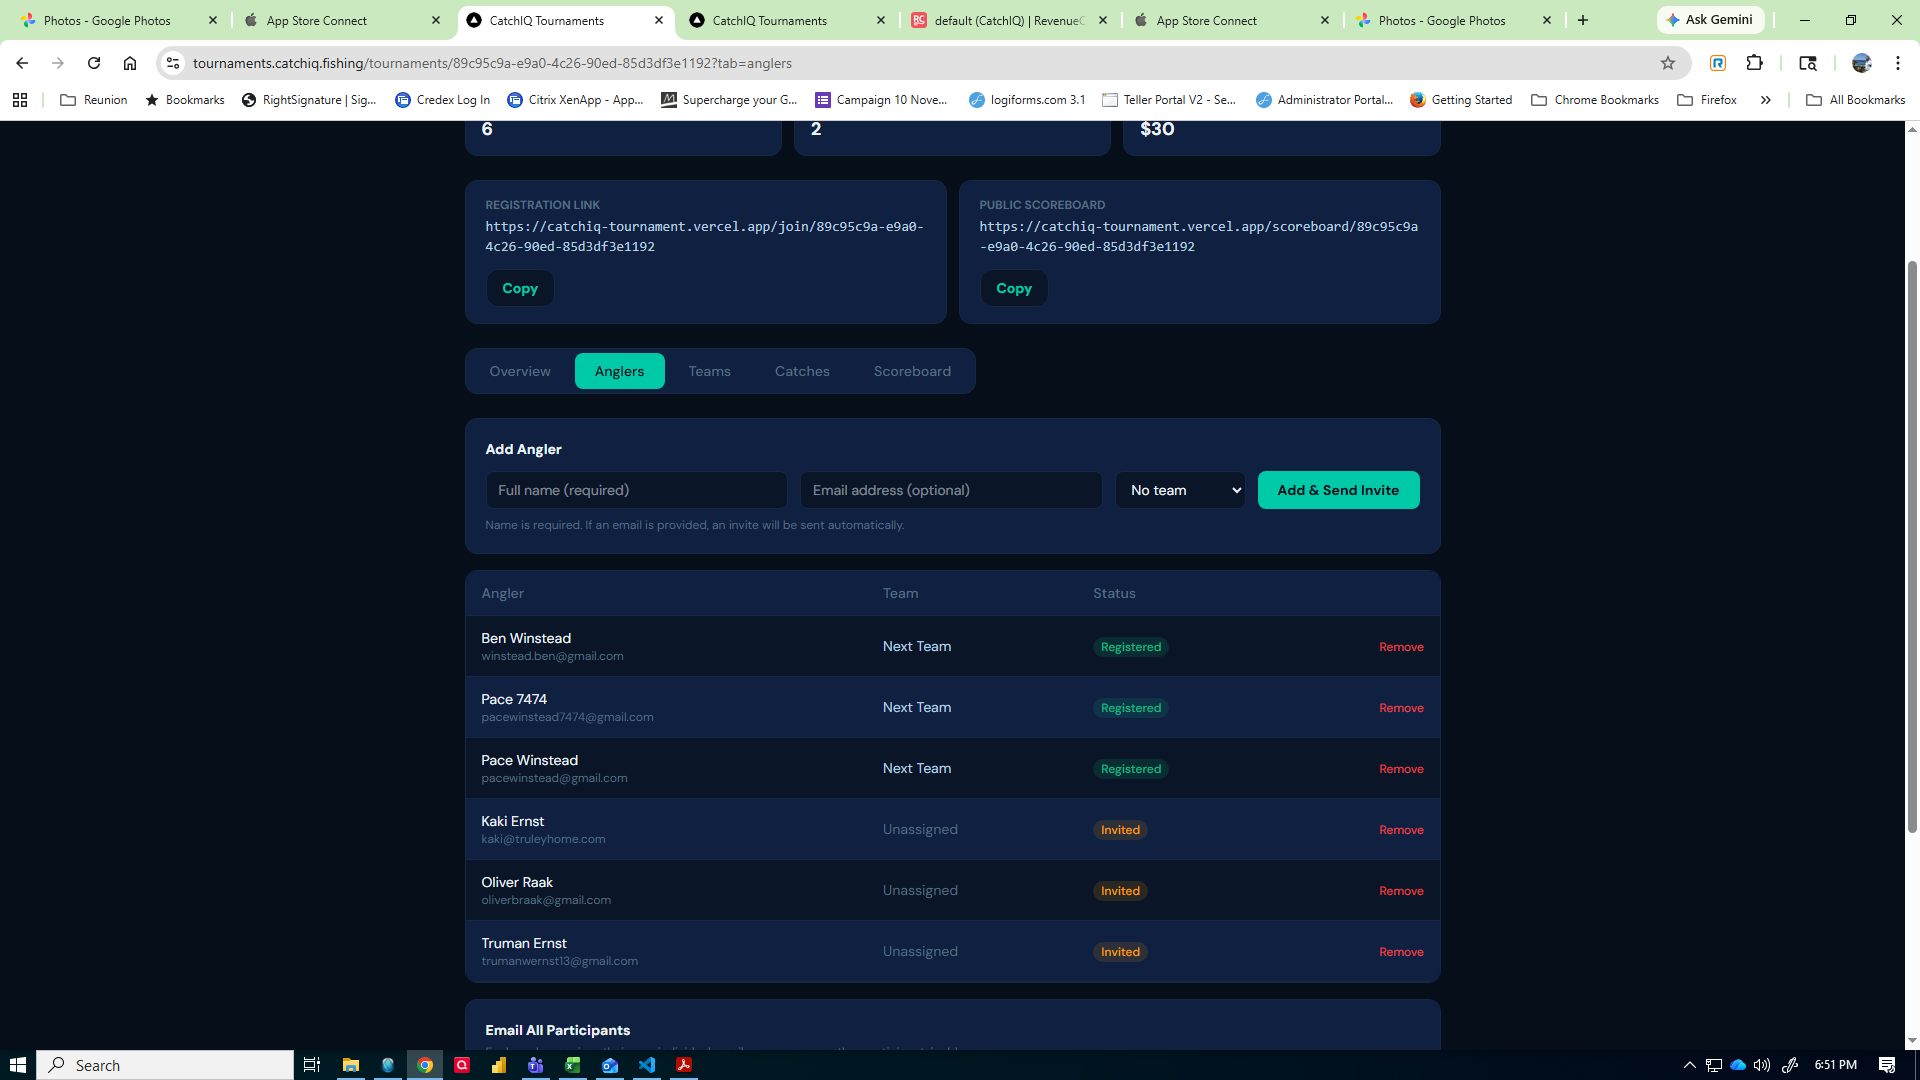
Scroll to the bottom of the Anglers tab to find the Email All Participants form. Enter a subject and message and click Send.
Each angler receives an individual email — no one can see other participants' addresses. Anglers without an email address on file are skipped and counted separately.
The Teams tab is visible only for tournaments with a team size of 2 or more. Use it to create named teams before or during registration.
- Click Create Team and enter a team name
- Assign anglers to teams either here or when adding anglers manually on the Anglers tab
- Anglers who register via the public join link can also select a team name during registration
- To remove a team, click Delete — anglers on that team become unassigned
Each team row shows the team name and how many anglers are assigned out of the maximum team size.
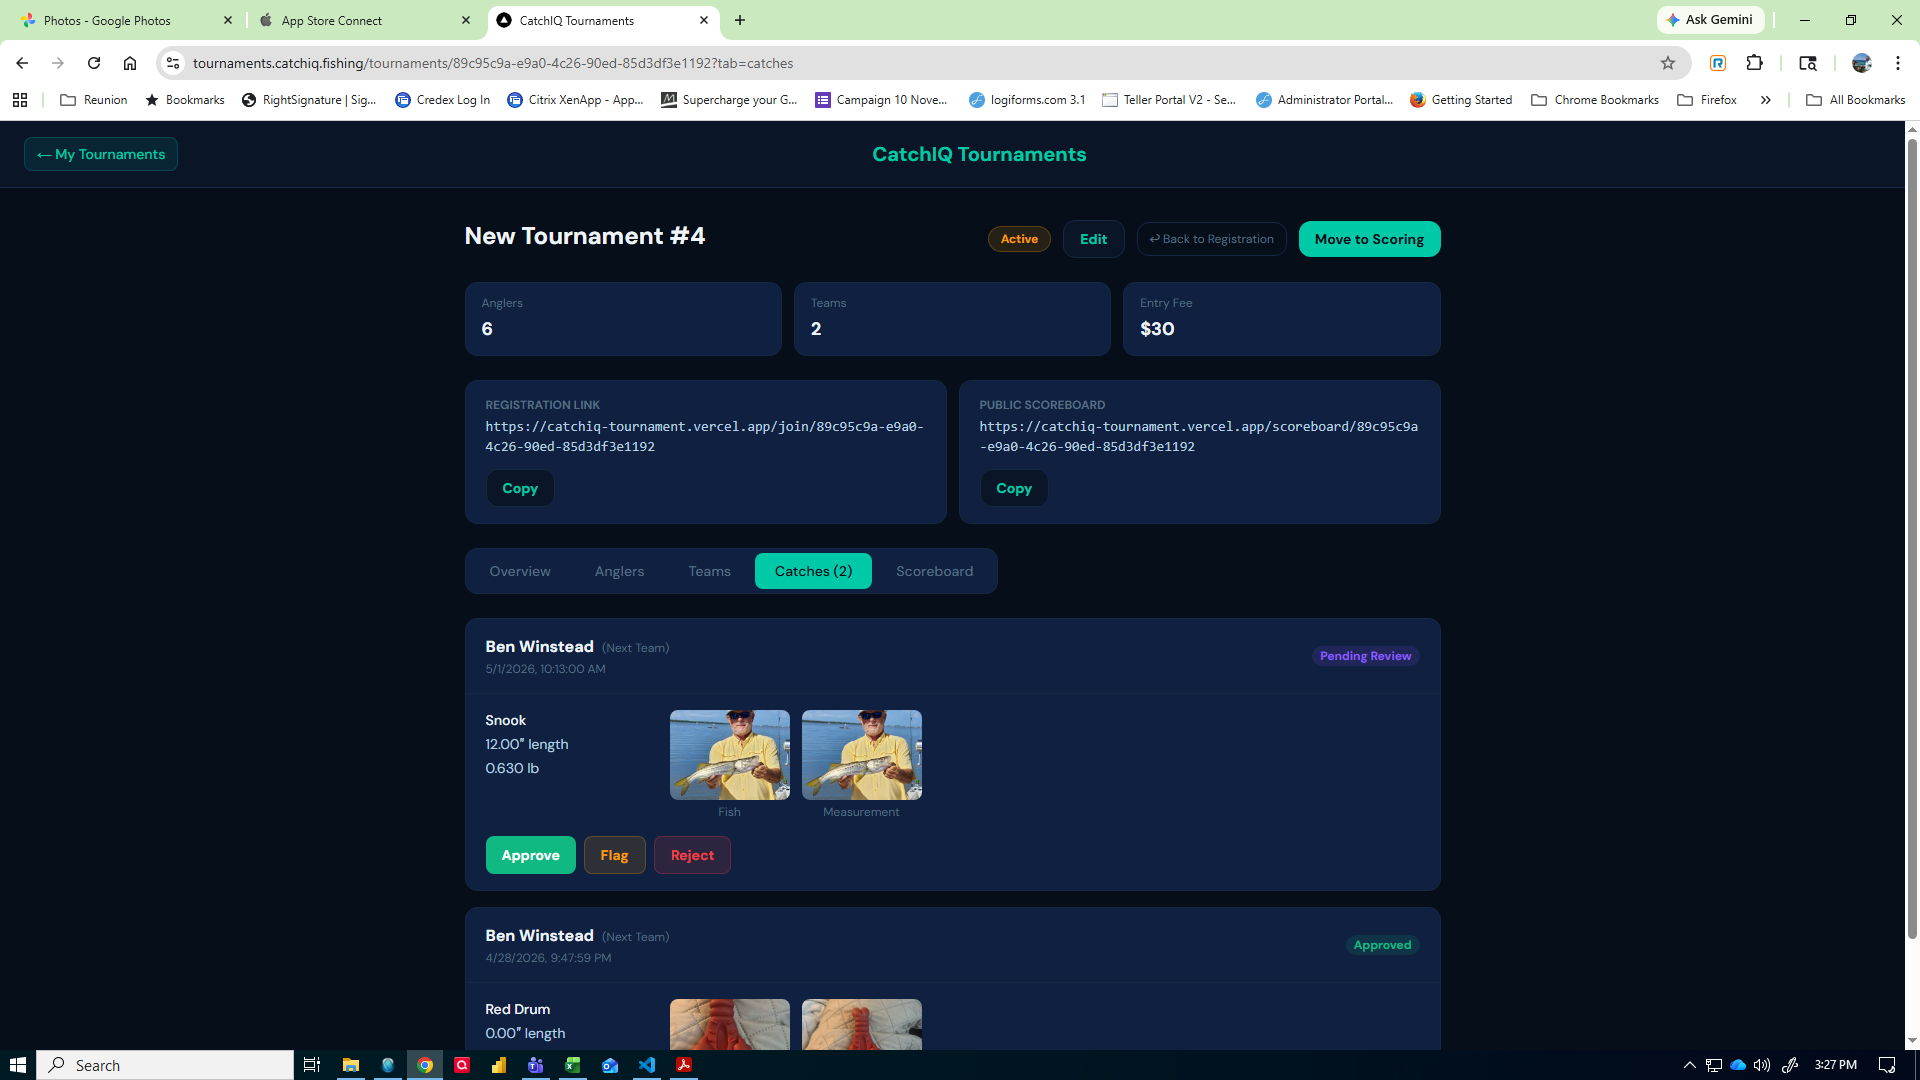
Open the Catches tab to see all catches submitted by registered anglers. Each catch card shows:
- Angler name and team (if applicable)
- Timestamp the catch was recorded
- Species, length, and weight
- Fish photo and measurement photo (click to enlarge)
- Any automatic flags raised by TrueCatch verification
For catches in Pending Review status, three action buttons appear:
- Approve — marks the catch as verified; it counts toward the scoreboard
- Flag — returns the catch to pending; useful while gathering more information
- Reject — disqualifies the catch; it is excluded from standings
Decisions update the scoreboard immediately.
The Scoreboard tab shows live standings based on approved catches and the tournament's scoring method. For team tournaments, both team standings and individual standings are displayed.
The score displayed depends on the scoring method chosen when the tournament was created:
- Largest single fish — longest single approved catch (inches)
- Total length — sum of all approved catch lengths
- Total weight — sum of all approved catch weights
- Most catches — total number of approved catches
Pending catch counts appear in amber next to each angler's name. Click Refresh to reload standings after reviewing new catches.
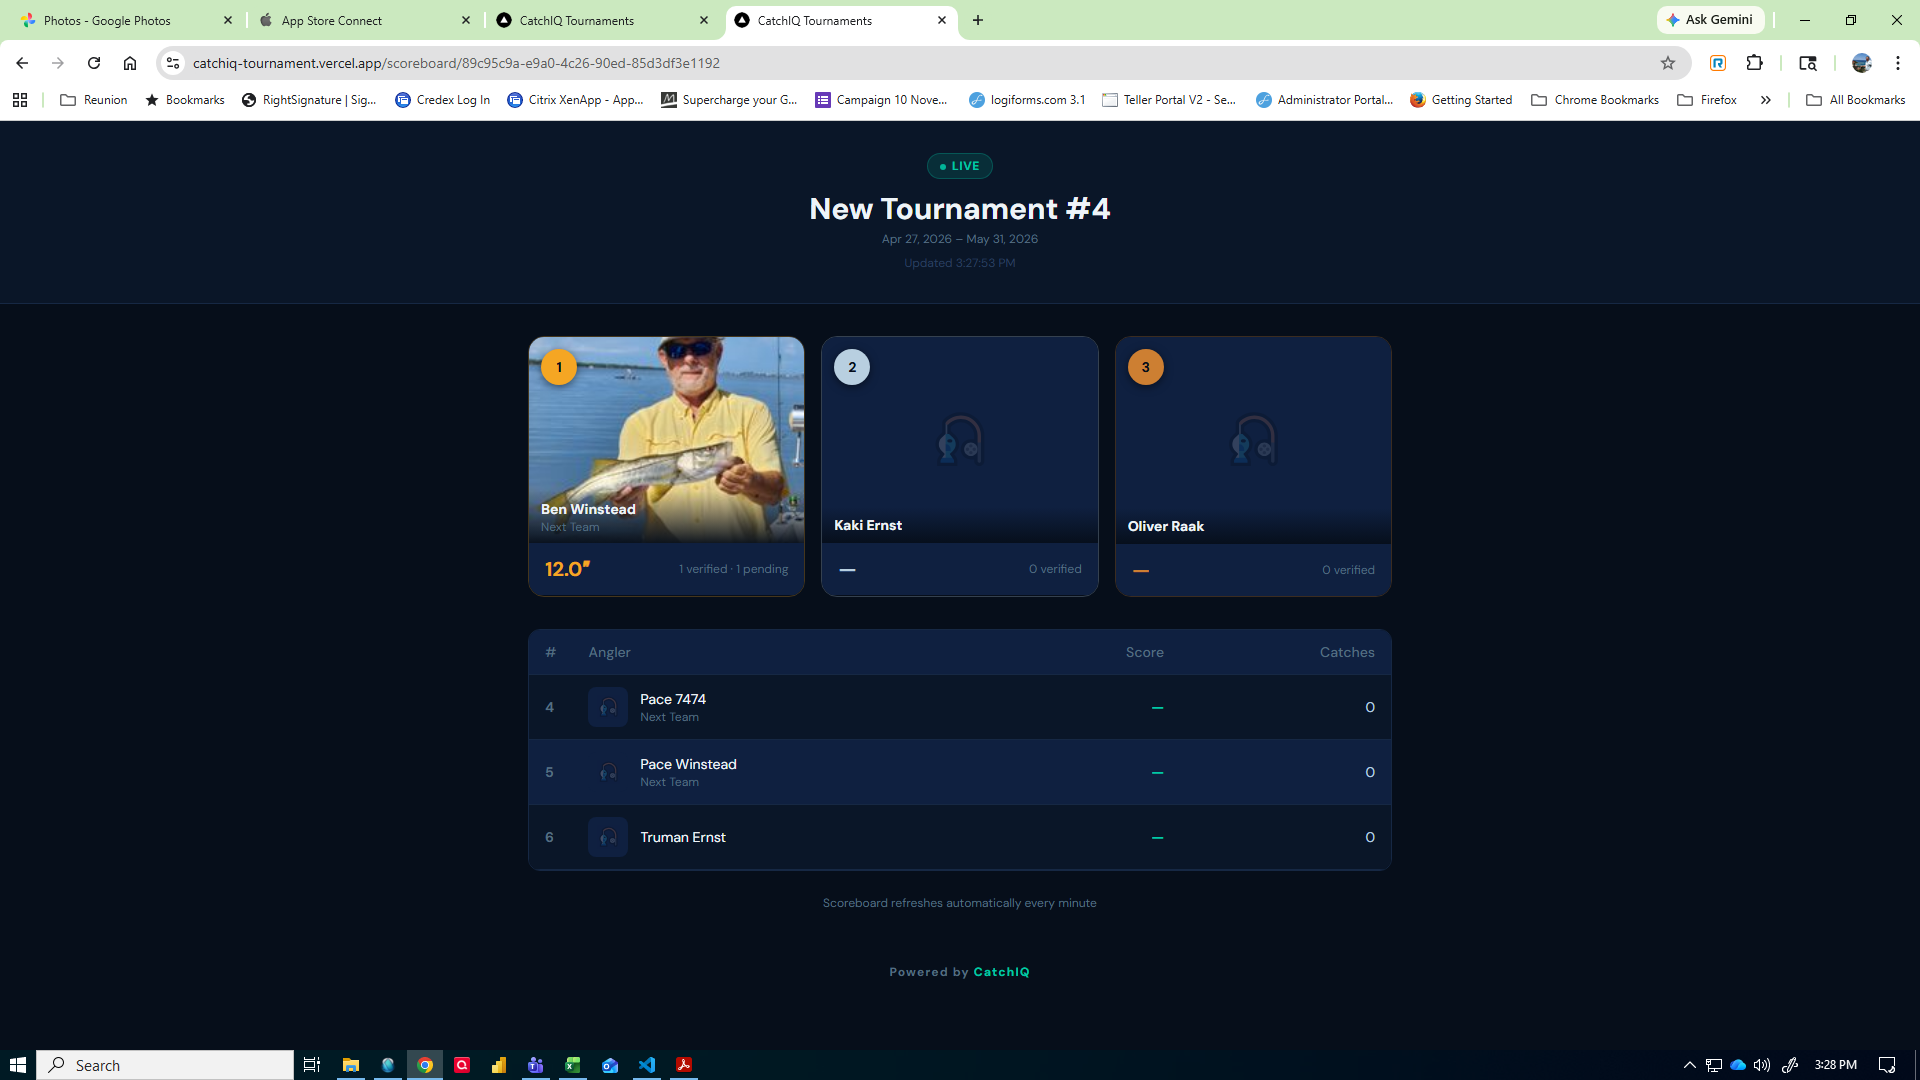
If the tournament was set to Public Scoreboard, a shareable link appears next to the registration link at the top of the tournament page. Anyone with this link can view live standings — no login required.
To enable a public scoreboard, go to Edit and set Public Scoreboard to Yes.
To collect entry fees you must connect a Stripe account. This is a one-time setup per organizer account — not per tournament.
- On the Dashboard, find the Payment Processing card
- Click Connect Stripe — you will be redirected to Stripe's secure onboarding flow
- Create a new Stripe account (or link an existing one), enter your bank details, and complete identity verification
- Once approved, you are redirected back to IQ.Fishing and the card shows Connected in green
Entry fees collected from anglers are deposited directly to your bank account by Stripe, minus Stripe's standard processing fee plus IQ.Fishing's platform fee.
Once connected, click Stripe Dashboard → on the Payment Processing card to open your Stripe account in a new tab. From there you can:
- View individual payment records and angler names
- Check your payout schedule and bank transfer history
- Issue full or partial refunds to individual anglers
IQ.Fishing does not process refunds — all refund actions are handled directly in your Stripe Dashboard.
For individual (non-team) paid tournaments, IQ.Fishing creates a Stripe Payment Link that is embedded in the registration flow. If you need to regenerate it — for example, after changing the entry fee — click Generate Payment Link (or ↻ Regenerate) in the Overview tab's Fees card.
You must have Stripe connected before a payment link can be generated. If Stripe is not connected, a warning will direct you back to the Dashboard.
Your tournament organizer will share a registration link via text, email, or social media. Open it in any browser — no IQ.Fishing account is required to register.
The page shows the tournament details: dates, location, species, scoring method, and entry fee.
- Enter your full name
- Enter your email address — your join code and instructions will be sent here
- Optionally enter your phone number
- Click Register (free tournaments) or Register & Pay (paid tournaments)
For team tournaments, additional fields appear after your personal details:
- Enter a team name (required)
- Click + Add team member for each additional angler on your team
- Enter each team member's name and email
- Click Register & Pay — one payment covers the entire team
After payment, every team member receives an individual email with their own personal join code. Each person links their own code to their own IQ.Fishing app account.
For paid tournaments, clicking Register & Pay redirects you to a Stripe-hosted checkout page. Enter your card details and complete payment.
After a successful payment you are returned to the registration page with a confirmation message. Your join code is emailed within a few minutes.
If you close or cancel the checkout without completing payment, you are returned to the registration form — no charge is made and you can try again.
After registering you will receive a confirmation email containing an 8-character join code (e.g. AB3D7K2M). You must enter this code in the IQ.Fishing mobile app to link your account to the tournament.
- Open the IQ.Fishing app on your phone
- Go to Settings → Tournaments
- Tap Enter Join Code and type your 8-character code
- Tap Claim My Spot — the tournament will appear in your tournaments list
Once linked, the tournament appears in Settings → My Tournaments. When the tournament goes Active, you will be prompted each day to opt in to tournament fishing before logging catches.
Once the tournament is Active and you have linked your join code, the IQ.Fishing app prompts you each morning: "Are you fishing in [Tournament Name] today?"
- Tap Yes, I'm fishing today to opt in
- The camera button turns gold — all catches you log automatically count toward the tournament
- Each catch requires two photos: one of the fish and one of the measurement
- Your catch is submitted to the organizer's review queue automatically
You can toggle individual catches off the tournament using the banner at the top of the catch form.